🗺️ Complete Walkthrough
The optimal route from beach to endgame, verified through hundreds of hours of playtesting — fewer detours, less pain
Table of Contents
📖 How to Use This Page (New players & veterans alike)
🟢 First time playing? Start from "Before You Start" and read through in order. Don't skip steps. Each step explains the reasoning.
🟡 Stuck mid-game? Use the progress tracker below to jump to your current stage.
🔴 Speedrunning on NG+? Jump straight to "Chapters 2 through Final" for boss prep checklists and key decision points.
💡 All players: This guide is based on hands-on testing of version 1.0, released June 5, 2026 — not educated guesses from trailers.
📊 Walkthrough Progress
Click a button to mark your current progress:
🎬 Official Launch Trailer — June 5, 2026
Before You Start: The 10 Things You Must Know
⚡ Best Opening Route (Tested)
- Talk to Diego — complete his tutorial quest for your first real weapon.
- Grab the Old Sword — near the bridge before Old Camp (under the hanged man).
- Return Drax's knife — he trades it for a free Shortbow. Best early ranged weapon.
- Use Old Camp as your base — most merchants, trainers, and quests.
- Keep Mordrag alive — he escorts you to New Camp for 2,000+ free XP.
- Visit Swamp Camp with Baal Parvez — safe escort through dangerous terrain.
- Save before handing Diego's List to anyone — the reward differs (750 vs 1,750 XP) depending on who gets it.
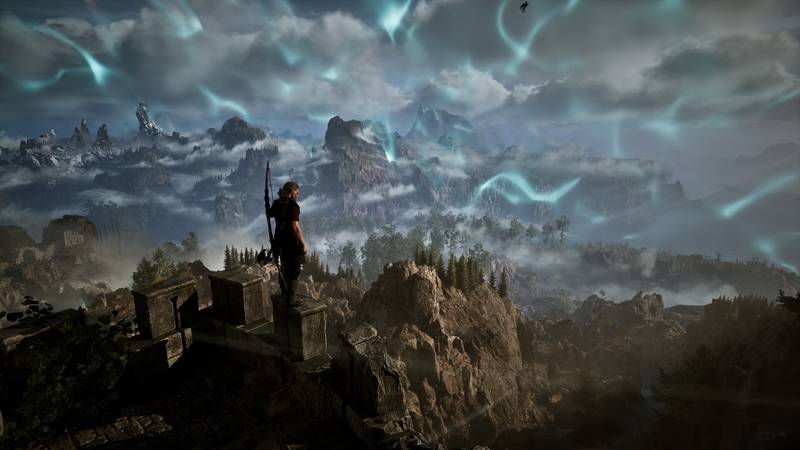
Okay, these are the rules I live by in this game. Learned every one of them the hard way — usually through reloading.
- Save often. Autosaves are rare. F5 quicksave, F9 quickload. Keep 3+ slots.
- Grab everything. No weight limit. Herbs, meat, ore, lockpicks — all of it.
- Stick to roads. Monsters avoid paths. Levels 1-3: running is smart.
- Pull one at a time. Never fight groups head-on. Lure them apart.
- Cook all meat. Cooked meat heals 2x. Free healing at any camp.
- Buy a map. Graham (Old Camp) or Dexter. No minimap exists.
- Train early. Scatty (parry) and Fingers (lockpicking) are the best LP spends.
- Complete all camp quests before joining. Faction choice is permanent.
- Quicksave before lockpicking. Broken locks need reloads.
- Don't buy armor pre-faction. Joining gives you free faction gear.
Chapter 1: Pioneering & Decisions The longest chapter, estimated 15-25 hours

Prologue: Waking on the Beach → Meeting Diego
After the opening cinematic, you wake up on the beach. The magical barrier looms in the distance — that's your goal. But don't rush. First, loot everything at your feet.
Beach Loot Checklist:
- Berries and herbs along the shore (for healing — grab as many as you can)
- Beer and ore near the abandoned barrels
- Anything that looks pick-up-able — remember, no carry weight limit
- Lockpick, Torch, 2x Beer, 4x Arrow, 11x Coins — in the chest southwest of the mine that Diego points out. Free starting gear, grab it before entering the mine.
- Pickaxe — inside the mine. Your second melee option.
- Rusty Sword — at the base of a tree after the Scavenger encounter.
- Ore Nuggets — in the cart near the Scavengers.
Follow the path inland. Diego will be waiting for you on the road. He offers to escort you to the Old Camp. Accept.
Why Diego Matters:
- He fights monsters during the escort — you get the XP
- He explains the world: the three factions, the origin of the barrier, the importance of ore
- Later on, he can train your Strength and Dexterity
- A core NPC for the Old Camp main questline
Journey to the Old Camp: Critical Pickups Along the Way
The road Diego leads you down seems unremarkable, but if you know where to look, it can transform your early game. Here is what you must grab along the way:
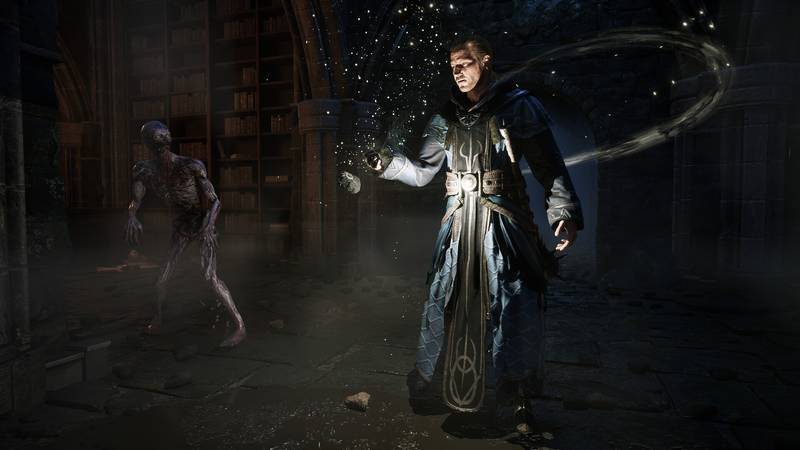 Key Weapon Locations Along the Route:
- Old Sword — next to a body beneath the gallows. Your first proper weapon, ten times better than fists.
- Club — near a Juvenile Scavenger nest. Higher damage than the Old Sword, but slower swing speed.
- Hunter's Knife — you'll encounter the NPC Drax on the road. Return his hunting knife to him and he'll give you a Shortbow for free. Don't keep the knife — the bow is far too important in the early game.
- Rider Bow — inside an underwater cave. Requires a short detour off the main path, but absolutely worth it. The best early-game ranged weapon.
NPCs Encountered Along the Way:
- Drax: Return his Hunter's Knife for a Shortbow. He can also teach you hunting skills.
- Ratford: With Drax; chat with him to get acquainted.
Arriving at the Old Camp: Settling In
The Old Camp is your first safe zone in the game. It has merchants, trainers, and a wealth of quests. Take time to learn the layout and talk to everyone.
First Priority — Get Your Free Safehouse:
- Find Guy, near the arena. He'll assign you a red-roofed hut right beside the arena. This is your home for all of Chapter 1 — it has a bed, storage chest, and lets you sleep to heal.
Must-Do Early Quests in the Old Camp:
- Snaf's Recipe: Find the cook Snaf and complete his ingredient quest. Afterwards, you can claim 3 free servings of Meatbug Ragout per day — the most reliable food source in the early game.
- Whistler's Sword: A classic fetch quest with solid XP.
- The Vanished Warder: Investigate the missing guard — this quest reveals the threat distribution around the camp perimeter.
Old Camp Key NPC Quick Reference:
- Scatty — Arena trainer for one-handed weapons. 10 LP + 50 ore unlocks parry. Invest early.
- Fingers — Teaches lockpicking. 10 LP + 100 ore. Also a priority.
- Graham — Sells maps. Buy one!
- Diego — Trains Strength and Dexterity.
- Thorus — Gives the quest "Out of Sight," a key quest on the Old Camp entry track.
- Snaf — The cook, free daily rations.
Heading to the New Camp: Mordrag Escort
Once you've done a solid round of Old Camp quests (around level 3-4), it's time for the New Camp. But don't go alone.
The Best Route — Let Mordrag Do the Work:
- Find Mordrag at the Old Camp and ask him to escort you to the New Camp
- He'll fight the monsters along the way — stand back and watch, you still get the XP
- His combat ability is decent; he can handle standard wolves and scavengers
- This route is ten times safer than going solo
New Camp Quests: Free Armor and the Swampweed Trade
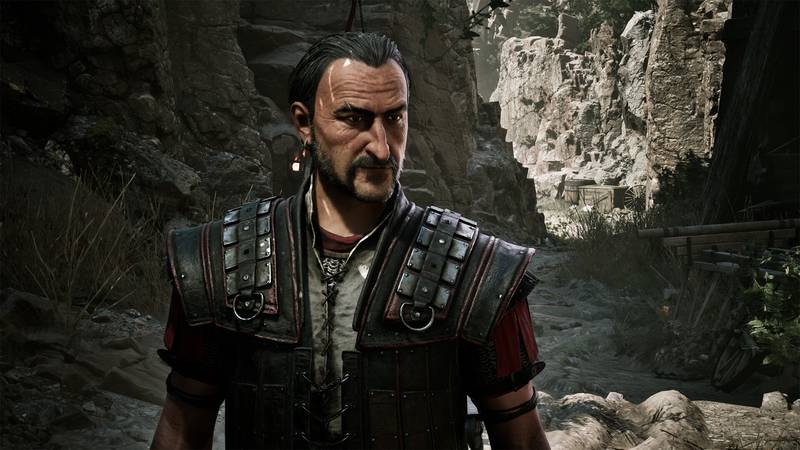 The New Camp is built on a lakeside hill, rougher in character than the Old Camp. No rigid hierarchy here — strength commands respect.
Core New Camp Quests:
- Canvassing Customers: Help promote swampweed — a courier quest with decent pay.
- Free Digger's Dress: Go to the Free Mine and find Swiney for a free set of miner's armor. Free armor is free armor. Take it.
- The Herb Merchant: A gathering quest, rewards XP + ore.
- The Raid: The New Camp's main entry quest, showcasing the tension between the New Camp and Old Camp.
- Full New Camp admission chain: Meet Lares (show Mordrag's Ring to Roscoe) → Earn Lares's Trust (Mordrag's Ring OR the Old Mine List from Test of Faith) → A Piece of the Pie → A Few Drops Too Much → Up to His Neck → The Raid. Complete The Raid to join the New Camp and end Chapter 1.
New Camp Key NPCs:
- Dexter — Sells maps, if you didn't already buy one at the Old Camp.
- Swiney — Free Digger's Dress. Do not miss him.
- Lares — Core NPC for the New Camp entry questline.
Heading to the Swamp Camp: Baal Parvez Escort
After wrapping up New Camp quests, it's time for the Swamp Camp. Again, do not go alone.
The Best Route — Let Baal Parvez Guide You:
- Find Baal Parvez at the New Camp and ask him to escort you to the Swamp Camp
- Same principle as Mordrag — he fights, you collect XP
- The road from New Camp to Swamp Camp is more dangerous than Old Camp to New Camp — you really want an escort
Swamp Camp: Earn the Recognition of Four Mentors
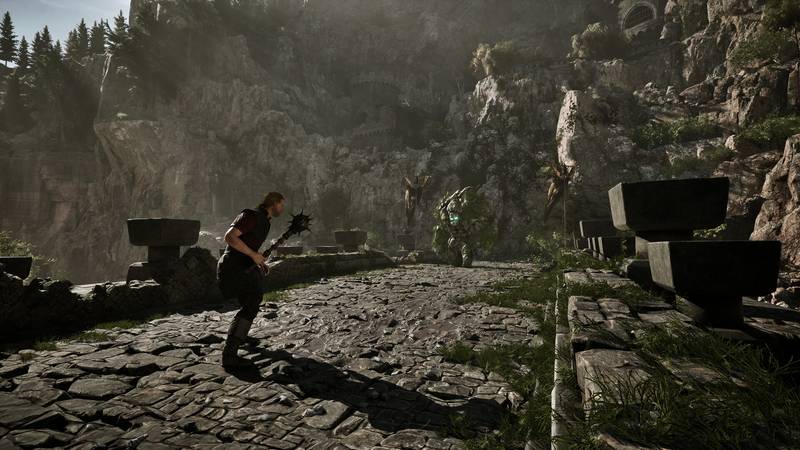 The Swamp Camp sits deep in the marshlands and serves as the headquarters of the Brotherhood. They worship the Sleeper and wield unique psionic magic.
Swamp Camp Entry Requirement — Gain Approval from 4 of the 5 Mentors:
- Namib — Complete his trial quest
- Tyon — Complete his trial quest
- Orun — Complete his trial quest
- Cadar — Complete his trial quest
- The five Gurus: Baal Namib, Baal Orun, Baal Cadar, Baal Tyon, Baal Tondral. You need favor from at least 4 of 5, plus reach Level 5.
You only need four out of five mentors. Each mentor's trial is different — some test your wisdom, some send you to collect rare items, others probe your magical aptitude. Pass them all and you become a Novice.
Making the Faction Decision
By now you've completed the entry quests for all three camps. You should be around level 5+, with a solid set of basic gear, a healthy ore reserve, and a mountain of experience.
Final Pre-Decision Checklist:
- All three camps' entry quests completed ✓
- At least level 5 ✓
- Parry unlocked (Scatty training) ✓
- Lockpicking unlocked (Fingers training) ✓
- Map purchased ✓
- Free Digger's Dress obtained ✓
- Object Outliner enabled ✓
🗺️ Map & Exploration
Valley Overview
Gothic 1 Remake is a big open world — three camps spread across the valley, trapped by a magical barrier. No minimap. No quest markers. You navigate by memory, landmarks, and hand-drawn maps bought from NPCs.
Buying Maps
- Graham (Old Camp, north gate) — sells Old Camp detailed map + broader Colony map
- Dexter (Old Camp market) — Colony map, cheaper than Graham's
- Maps are hand-drawn sketches — they show settlements and roads, not GPS.
Safe Routes Between Camps
Old Camp → New Camp
Main road west. Have Mordrag escort you — he kills enemies, you get all XP (2,000+ per trip).
Old Camp → Swamp Camp
East through the marshes. Let Baal Parvez escort you — he safely navigates dangerous areas.
Exploration Golden Rules
- Stick to roads early — beasts avoid paths
- See a wolf, assume three more — pull one, retreat, fight alone
- Ignore Shadowbeasts and Snappers at low levels — run, don't look back
- Save before entering new areas
- Enable Object Outliner in Accessibility settings
📸 Visual Walkthrough
⚠️ Screenshots are still being gathered from actual gameplay. For now, use the text overview below or head to the Full Walkthrough and Daily Tips for detailed steps.
🎬 Opening: Beach to Old Camp
Follow Diego, loot everything (no weight limit). Key items: Old Sword (under hanged man), Club (near Scavenger corpse), Hunter's Knife (return to Drax for free Shortbow). Underwater cave near Drax has Rider Bow.
🏕️ Choose Your Faction
Old Camp (🔥) — Central, Diego leads you here. Fire Mages, Circles 1-6.
New Camp (💧) — West. Mordrag escorts you. Mercenaries, Water Mages, best economy.
Swamp Camp (🌀) — East marshes. Baal Parvez escorts you. Templar spellsword hybrid.
🔐 Lockpicking
Sliding plate system — not buttons. See the Lockpicking Guide for full details.
🎬 Official Videos
Making-of Series
Steam store page has the full screenshot gallery: View on Steam →
Chapter 2: Faction Main Quests Unfold Estimated 8-15 hours
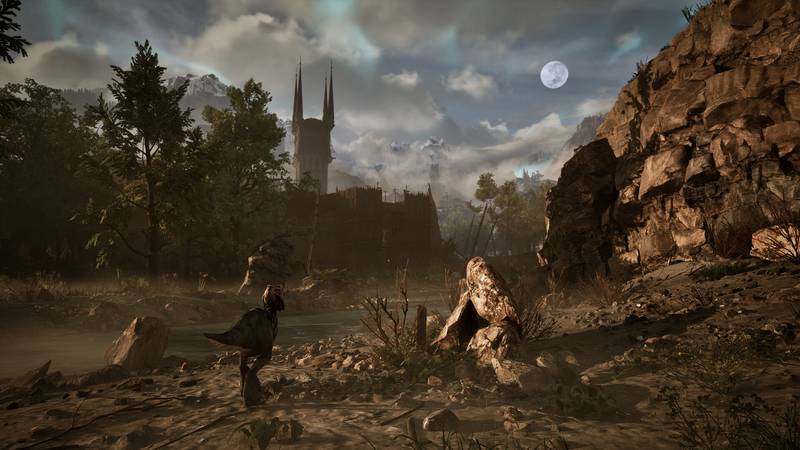
🔥 Old Camp Route — Becoming Gomez's Shadow
After formally joining the Old Camp, your rank is Shadow — a grassroots enforcer in Gomez's inner circle. Your starting gear includes Shadow Armor, the earliest advanced-tier armor available outside the Old Camp guard roster. Your immediate superior is Guard Captain Thorus, who issues combat assignments; the old fox Diego is your intelligence source — hidden solutions to many quests are buried in his dialogue.
Core Questline: Old Mine Resupply & Investigation
- "Old Mine Supplies" — Thorus sends you to deliver supplies to the guards in the Old Mine. What appears to be a routine transport run quickly reveals a serious drop in ore output. Miners privately complain that "something is off" deep in the mine. Pay attention to your conversation with Guard Captain Ian — he has first-hand intel on the tunnel collapse.
- "Ore Shortage Investigation" — Diego privately tasks you with uncovering the real reason for the declining ore yield. You'll need to go deep into the Old Mine and fight through Minecrawlers. These insectoid creatures resist slashing and piercing damage — you must use blunt weapons (hammers, maces) to deal with them efficiently. Minecrawler nests are typically in dark corners where tunnels turn; use a torch to scout ahead and stop immediately if you hear hissing.
- "The Guard Captain's Trust" — Build relationships with multiple guard captains. Beyond Thorus, the other captains include Bloodwyn and Scar, each offering side quests that unlock additional training options and gear purchase permissions upon completion.
Old Mine Dungeon Exploration Essentials
The Old Mine is the first major underground area you'll encounter. It's divided into an above-ground worksite and a two-level underground tunnel system. Key locations deep in the tunnels:
- Collapsed Tunnel (Level 1) — The miner camp near the entrance has a merchant selling repair hammers and healing potions. This is also a great grinding spot: Minecrawlers appear singly here, roughly 150 XP each.
- Deep Tunnels (Level 2) — From here, Minecrawlers appear in groups of 2-3. Recommended level 7+. In the deepest section, an abandoned excavation command room holds a solid blunt weapon and several journal entries hinting that the ore possesses "special properties" — this is a main-story breadcrumb.
- Ore Extraction Chamber — A large cavern in the mid-tunnel section where you can see how ore is centrally collected and initially refined. Take note of the massive ore veins on the walls — if you've learned the basics of Fire Runes from Corristo, you'll notice these ore deposits are unlike ordinary minerals.
Key NPCs & Unlockable Content
- Thorus — Your combat quest source. Completing his assignments unlocks access to the guard training grounds and a 20% discount on Strength and one-handed/two-handed weapon training.
- Diego — The information broker. He knows secrets about nearly every NPC in the Old Camp. Speaking with him before certain quests can unlock hidden dialogue options.
- Corristo — Fire Mage and one of the Old Camp's spiritual leaders. If your stats qualify (Mana 25+), he'll teach you Fire Magic basics: Fire Bolt and Fire Arrow. The Old Camp is not a mage faction, but fire magic is an effective supplement against mine-dwelling monsters.
- Fletcher — The Old Camp blacksmith, capable of forging and upgrading weapons. Bring him the ore you collect in the tunnels to unlock special weapon recipes.
💧 New Camp Route — Mercenary of the Free Mine
After joining the New Camp, your rank is Mercenary or Bandit (depending on whether you followed Lee's path or Lares' path during entry), and you receive the Bandit's Dress as your starting faction armor. The New Camp's core advantage is the Free Mine — ore yields here are 30% higher than the Old Mine, and the ore you dig up can be directly traded for gear and training, giving you the fastest leveling pace of any faction.
Core Questline: The Rice Lord's Quests
- "The Rice Lord's Quests" — This is the single most important quest chain in New Camp Chapter 2, issued by the New Camp intelligence chief Rice Lord / Lares. Lares is a shrewd smuggler with underground networks across all three camps. His quest chain includes:
- Deliver Secret Messages — Carry encrypted instructions to contacts in the Old Camp and Swamp Camp. The route crosses wilderness; stick to the ridge trails along the river to avoid monsters on the main roads.
- Escort the Supply Convoy — Protect the ore transport caravan from the Free Mine to the New Camp dam. The convoy will be ambushed by monsters (mostly young Shadowbeasts and wolf packs); bring a ranged weapon (bow or crossbow) and take the high ground ahead of time.
- Sabotage Old Camp Supply Lines — Infiltrate the Old Camp perimeter to burn supply crates or poison water sources. These missions can be completed via stealth or direct assault; the rewards are the same but the XP bonus differs (stealth completion grants +50% XP).
Free Mine Exploration
- The Free Mine — The New Camp's open-pit mine, far more spacious than the Old Mine. This is the ideal location for leveling ranged weapon skills — stand up on the mining platforms and safely pick off monsters below. The Free Mine's defining feature is exposed ore veins; you don't need to venture deep into tunnels to extract large quantities of ore.
- The Water Mages' Secret Project — Deep in the Free Mine, you'll discover a temporary research station operated by the Water Mages. Saturas and his disciples are studying the magical properties of ore. If you agree to help them gather ore samples, Saturas will reveal that ore and the barrier share a deep connection — this is no ordinary mineral deposit, but a form of energy conduit.
Key NPCs & Unlockable Content
- Lee — Mercenary leader of the New Camp. He gives you straightforward military missions; completing them unlocks high-tier weapon purchase permissions. Lee's path favors Strength-based warriors, with rewards mostly consisting of heavy armor and two-handed weapons.
- Wolf — Bow master. If you're going for a ranged build, Wolf is your most important mentor. Complete his hunting quests (slay a specified number of target monsters) and he'll teach you the Precision Shot skill — +10% critical hit chance.
- Saturas — Head of the Water Mages. His dialogue holds the most crucial main-story information: the Water Mages believe ore is a type of "magical conductor," and that the barrier itself may be powered by ore. This information proves vital in the final chapter.
- Jarvis — Dam guard captain. He controls the New Camp armory; completing his patrol assignments unlocks rare crossbows and explosive bolts at a discount.
🌀 Swamp Camp Route — Adept of Psionic Magic
After joining the Swamp Camp, your rank is Novice, and you receive the Novice Robe. The Swamp Camp route is entirely different from the other two factions — you're not digging ore or waging battles, but immersing yourself in the Brotherhood's training system and learning Psionic Magic — the most unique spell system in the game.
Core Questline: Continuing the Mentor Trials
You've already earned the approval of four mentors in Chapter 1 (Namib, Tyon, Orun, Cadar). Chapter 2 deepens these trials. Each mentor now presents higher-level challenges; passing them unlocks spells and abilities in their respective domains:
- Namib's Advanced Trial — Namib tests your mental resilience and willpower. His advanced trial requires you to enter a deep meditative trance and face your fears in a vision. Finish it and you get the Telekinesis spell — remotely pick up items and trigger mechanisms, an invaluable utility skill for exploration.
- Tyon's Advanced Trial — Tyon focuses on Sleeper doctrine and runic knowledge. His advanced trial is a series of knowledge quizzes and rune interpretations. Passing unlocks the Sleep spell — puts a single enemy into slumber; effective against most non-boss enemies (including some undead), duration roughly 15 seconds. This is the core crowd-control spell of the Swamp Camp route.
- Orun's Advanced Trial — Orun handles logistics and discipline. His advanced trial is practical: venture into the deep swamp to harvest raw Swampweed specimens and learn to properly process them. Passing unlocks the Fear spell — sends enemies fleeing in terror, particularly effective against groups and elite enemies. Fear has a lengthy cooldown (90 seconds) but a high cast success rate.
- Cadar's Advanced Trial — Cadar is a high-level adept of psionic magic. His advanced trial is the most dangerous: you must enter the Soul Altar deep in the swamp and defeat a Psionic Wraith twisted by the Sleeper's power. Passing unlocks Wind Hammer — a frontal cone AoE knockback + damage, the core area-damage spell of the Swamp Camp route.
The Swampweed Ritual and Sleeper Worship
- The Swampweed Ritual — This is the signature event of Swamp Camp Chapter 2. The Brotherhood holds a collective ceremony where all adepts, guided by the mentors, inhale swampweed extract and enter a shared vision. In the vision, you will "hear" the Sleeper's voice for the first time — not as language, but as waves of emotion and visual fragments. Each person's experience differs: some feel peace and revelation, others feel dread and oppression. Your experience depends on the choices you made in your trials.
- Fortuno — The Swamp Camp's herb supplier; he brews swampweed at the camp center every day. Maintaining a good relationship with him is crucial — he'll give you a free daily dose of swampweed (used for mana restoration), and his dialogue is filled with hints about the Sleeper's true nature.
Swamp Camp Exclusive Spell List
By the end of Chapter 2, as a Novice you can acquire the following spells (all or some, depending on which mentor trials you completed):
- Sleep — 15 Mana, single-target, puts an enemy to sleep for 15 seconds. Sleeping enemies can be killed with a single stealth finisher (bypassing all remaining HP).
- Fear — 25 Mana, AoE, makes enemies in the area flee in terror for 10 seconds. Feared enemies won't attack you but may alert nearby allies while fleeing.
- Telekinesis — 5 Mana/second sustained cost, remote pickup/manipulation. Can't open a locked chest? Use Telekinesis to "pull" the contents out.
- Wind Hammer — 30 Mana, frontal cone knockback + medium damage. Cast when surrounded to instantly clear space.
- Psionic Sense — Passive skill, displays nearby creature positions on the minimap (including enemies behind walls). Makes exploration and sneaking way easier.
Cross-Faction Shared Content in Chapter 2
Regardless of your faction, Chapter 2 includes shared developments that begin to unveil the truth behind everything:
The Secret of Ore
- Every faction, through different scenes, discovers that the ore is "off." Old Camp players hear miners say the ore radiates an odd "warmth." New Camp players learn from Saturas that ore is a magical conductor. Swamp Camp players see the ore "glowing" during ritual visions.
- Why is ore so important? Not just because it's valuable — it appears to have a direct energy link to the Magical Barrier. This thread expands dramatically in Chapter 3.
The First Signs of the Sleeper
- Swamp Camp players sense the Sleeper's presence directly through rituals — but the other two camps detect the same thing through their own channels.
- Miners in the Old Mine report "whispers" coming from deep within the tunnels. Old Camp guards privately admit that their nightmares have been getting worse and more frequent.
- The New Camp's Water Mages are monitoring a magical fluctuation rising from deep underground — Saturas calls it a "Ley Line Disturbance."
Recommended Status by End of Chapter 2
- Level 8-12 (varies by faction and completionism)
- Primary weapon skill 30%-45%
- Faction-exclusive armor obtained (Shadow Armor / Bandit's Dress / Novice Robe)
- At least one core spell learned (all factions have a path to learn one)
- Ore reserves 500+ (to prepare for Chapter 3 gear upgrades)
- Main areas of Old Mine / Free Mine explored
👑 Boss: 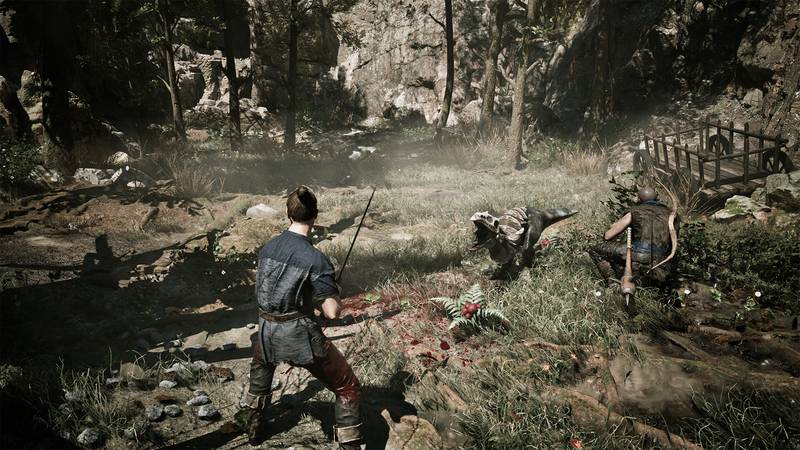 The Minecrawler Queen (Old Mine Nest)
Where to start: After completing The Almanac quest, talk to Cor Kalom at his alchemy lab in the Swamp Camp. Exhaust his dialogue to get 5 Light Scrolls and 5 Extract of Healing potions before heading out.
Preparation — Recruit the Templars
- Prove your strength: Find Cor Angar at the Swamp Camp training grounds. Duel Gor Na Dun (slow two-handed sword). Don't leave the platform and don't kill him. Dodge his heavy strikes, counter between combos. Win to learn Extract Secretion — needed to harvest Minecrawler Mandibles.
- Find Lester in the Old Mine (northwest of Old Camp). He's on the lowest level with Asghan at a blocked gate.
- Recruit three Templars: Gor Na Kosh (joins free), Gor Na Vid (needs a swampweed roll), Gor Na Bar (needs 4 Minecrawler Mandibles — lure minecrawlers toward guards for an easier fight).
- Ian's cog: Find Ian one level up. He needs a cog for his ore crusher — it's in a side tunnel three levels below him (look for the lone guard, broken handcart, and white sacks). Loot the Essence of Dexterity from a corpse in the tunnel too.
- Explosive barrel: After Ian's refusal, leave the mine — Lester meets you at a lake with Diego, Milten, and Gorn. You get an Explosive Barrel and an Explode scroll. Diego cashes in a favor to convince Ian. Return to Asghan, place the explosive, and blow the tunnel.
⚠️ Save before entering the nest alone.
Clear 10+ Minecrawlers and Nymphs through dark, webbed tunnels. Light the torches on the walls, save often, and use ranged attacks to whittle enemies down.
Phase 1 — Stationary Queen
- Attacks: Ranged spit (dodge sideways before it leaves her mouth), melee claw swipes (deadly up close).
- Key mechanics: Leaving the arena resets her to full HP. Missed spits spawn Nymphs. Nothing staggers her.
- Strategy: Fire Magic from mid-range is very reliable (bring mana herbs/potions). Melee: run in, dodge spit → dodge right swipe → dodge spit → land one heavy hit → back off. Use a one-handed weapon — two-handers are too slow.
- At half HP: Cutscene — she sheds her carapace and retreats. Save, heal, and follow.
Phase 2 — Mobile Queen
- New attacks: Three-swipe combo (covers distance — dodge backward rhythmically), ground stomp (rears up, then slams — cannot be blocked, dodge backward), ranged spit still present.
- Melee strategy: Get close to her legs, land 1-2 swipes. She'll rear up for a stomp ~75% of the time — dodge it, repeat. With Trained/Master one-handed, parry her swipes for a riposte window.
- Ranged strategy: Fire magic or arrows, then retreat into the corridor when she chases. She breaks off, allowing you to re-engage. Repeat.
- Kill Nymphs regularly — they drain HP and block movement. Avoid the empty larva shells on the dark side — you can get trapped.
- Be careful with parries: A mistimed parry often leads to a follow-up spit attack — be ready to dodge sideways.
Loot & Rewards
- 2,000 XP for the kill.
- Corpse drops: 4 Minecrawler Eggs + Queen's Pheromone Gland (keep it — needed for the Beasts of Khorinis II side quest, which teaches the Extract Organ skill).
- Return eggs to Cor Kalom: +2,500 XP. Plus Cog in the Wheel: +750 XP and 25 Ore Nuggets.
Chapter 3: The Sleeper's Shadow Estimated 5-8 hours

The Sleeper's Influence Escalates
Nightmares Sweep the Colony
At the start of Chapter 3, you'll find NPCs across all camps complaining about the same thing — nightmares. Guards, miners, merchants, even mages — everyone dreams the same scene: a vast underground presence calling to them. The specifics vary by faction:
- Old Camp — Guards wake in the night to find the campfires extinguished for no reason. Fletcher says he saw "a massive temple of ore" in his dreams. Diego privately tells you that Gomez has become more irascible lately, as if something is influencing him.
- New Camp — The Water Mages' Ley Line Disturbance readings have jumped from once per day to multiple times per hour. Saturas convenes an emergency meeting, concluding that "the source is awakening." Lee reinforces the night patrols — not against monsters, but against something "unseen."
- Swamp Camp — The Brotherhood's adepts believe this is a sign of the Sleeper's imminent "descent." The mentors split into two factions: one believes they should offer more swampweed to appease the Sleeper, the other (led by Tyon) begins questioning whether the Sleeper's intentions are truly as "benevolent" as the doctrine claims.
Monster Behavior Anomalies
Monsters across all regions begin exhibiting abnormal clustering behavior. Previously scattered groups now actively move toward the mine areas — scavenger packs, shadowbeast packs have been observed, and there are even reports of Orc patrols appearing on the mine perimeter. The danger level of the wilderness has jumped at least two notches:
- Scavenger and Meatbug populations are dwindling — they're being replaced by larger predators.
- Shadowbeast patrol ranges have expanded into previously safe zones.
- Undead appear for the first time on the Old Mine perimeter — skeletons and zombies, resistant to ordinary physical attacks. You must use silver weapons, holy-water-blessed weapons, or fire magic to deal with them efficiently.
The Ancient Ruins — What Lies Beneath the Mine
This is the most pivotal discovery of Chapter 3. In the deepest section beneath the Old Mine, miners blast open a non-natural wall — behind it lies an ancient architectural complex, far older than any known human civilization. The three factions react in starkly different ways:
Ancient Ruins Exploration Essentials
- Ruins Entrance — Located one level below the Old Mine Deep Tunnels (beyond the Minecrawler nest from Chapter 2). The entrance is guarded by a large undead force (8-10 skeletons + 2 Undead Priests). Recommended level 10+, bring a silver weapon and 10+ healing potions.
- Antechamber — Upon entering, a vast circular hall with walls covered in unrecognizable script. If you learned Psionic Sense from the Swamp Camp, you'll detect intense magical residue here. The hall's center holds a dormant teleportation slab — currently unusable, but Saturas tells you it may be a core component of the barrier.
- Left Corridor — Library — Stone tablets and scrolls left by the ancient civilization (some already translated into common tongue). Contains first-hand records on the origin of ore: these are not natural minerals, but artificially created substances called "Conduit Stone" — core materials used by an ancient civilization to construct large-scale magical structures.
- Right Corridor — Ritual Chamber — Here stands the first effigy of the Sleeper (or rather, its vessel/avatar). The effigy is surrounded by a powerful magical barrier and cannot be approached directly. You must destroy the four ore pillars in the corners of the chamber (use blunt weapons or fire magic) to dispel the barrier. At the barrier's center lies an Ancient Weapon — randomly generated, purple (rare) quality, a major upgrade to your current setup.
- The Sealed Gate at the Depths — At the deepest point of the ruins, a massive stone door inscribed with the same runic patterns as the barrier. The door has a recess shaped exactly like a piece of Conduit Stone. You can't open it yet — this is the key to Chapter 4.
Three-Faction Conflict Escalates
With the discovery of the Ancient Ruins and the truth about ore surfacing, the tension between the three factions escalates from shadow games into open conflict:
- Old Camp vs. New Camp — Upon learning that the New Camp discovered the Water Mage research station in the Free Mine, Gomez directly orders the mountain pass to the New Camp sealed. The New Camp responds by fortifying the Free Mine defenses and dispatching mercenary squads to ambush Old Camp supply convoys on the mine perimeter. NPCs from both sides now show hostility toward players not of their faction — if you have a criminal record in the Old Camp (like being caught stealing), NPC dialogue options in the New Camp will be affected.
- Swamp Camp vs. The Other Two — The Brotherhood fractures internally. The Orthodox faction (led by Orun) believes they should "spread the Sleeper's blessing to all camps" — essentially forced conversion. The Reformists (led by Tyon and Namib) argue this will trigger war. Your choice affects the Swamp Camp's trajectory in Chapter 4 — supporting the Reformists yields more diplomatic quests; supporting the Orthodox faction yields stronger combat spell rewards but costs you some allies.
- A "Third Side" Among the Three — Outside the main conflict, certain neutral NPCs begin offering cross-faction quests. Diego (Old Camp), Lares (New Camp), and Fortuno (Swamp Camp) have actually been secretly communicating — they share concerns about their respective leadership's decisions. If you've built sufficient reputation across all three camps, you can trigger a hidden "Neutral Alliance" questline.
Chapter 3 Key Decisions
Several irreversible choices in this chapter affect the subsequent story:
- In the Ancient Ruins, choose whether to take or leave the Ancient Weapon — taking it prematurely triggers an undead uprising; leaving it grants additional ruin exploration clues in Chapter 4.
- In the Brotherhood schism, choose whether to support Tyon (Reformist) or Orun (Orthodox) — this determines how Swamp Camp NPCs treat you in Chapter 4.
- Whether to share the Ancient Ruins intelligence with your faction leader — sharing accelerates the main story but triggers the Chapter 4 faction conflict earlier; withholding gives you more time for free exploration but reduces faction reputation.
First Direct Contact with the Sleeper's Power
The end of Chapter 3 features an unavoidable story encounter — your first taste of the Sleeper's personal attention directed at you. Upon returning to the surface from the Ancient Ruins, a telepathic force violently pulls you into a hallucinatory state (regardless of your faction or level):
- In the vision, you see a vast underground chamber (later confirmed to be the Orc Temple of Chapter 4 / Final Chapter).
- The Sleeper "speaks" to you telepathically — not in words, but as an onslaught of emotions and images. You sense its existence is ancient, twisted, and in agony — it is neither god nor demon, but a trapped, spiraling-out-of-control energy entity.
- If you participated in multiple swampweed rituals on the Swamp Camp route, this contact will be even more intense — you'll directly perceive the true nature of the Conduit Stones: they are the Sleeper's energy conduits. Every piece of ore mined weakens the barrier and accelerates the Sleeper's power leaking outward.
After this encounter, your character gains a permanent passive effect: +15% damage against monsters within the Sleeper's sphere of influence (because you can now "sense" their energy fluctuations). However, your character will occasionally experience brief hallucinations while sleeping — purely atmospheric, no gameplay impact.
Recommended Status by End of Chapter 3
- Level 12-16
- Primary weapon skill 45%-60%
- Equipped with faction advanced armor or Ancient Ruins purple gear
- At least one silver / holy-water-blessed weapon (mandatory for undead)
- Healing potion reserves 15+, Mana potions 5+ (mage route: 10+)
- Ancient Ruins Antechamber, Library, and Ritual Chamber fully explored
- Sealed Gate discovered but not yet opened
Chapter 4: Banishment & Turning Points Estimated 5-8 hours
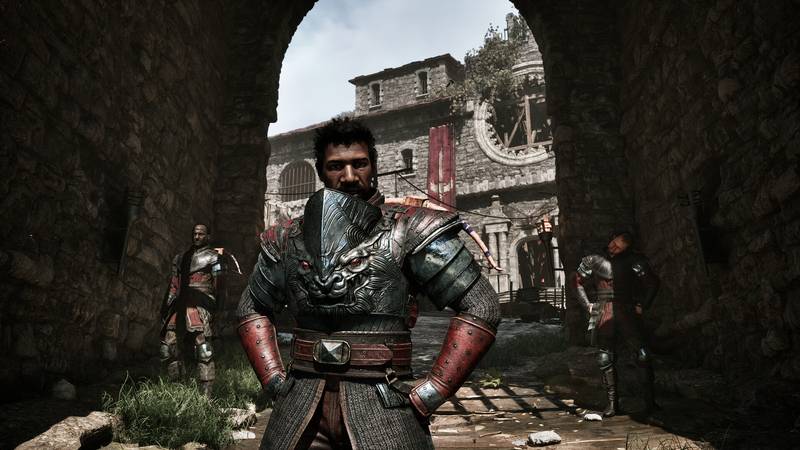
🔥 Old Camp Route — Gomez's Betrayal and Banishment
This is the most famous story twist in the entire Gothic 1 Remake. After you return from the Ancient Ruins and report your findings to Gomez, the dictator makes a decision: you're too dangerous to keep around.
Complete Banishment Event Walkthrough
- Trigger Condition — Complete the Ancient Ruins discovery report, and Gomez realizes you know too much about the "Conduit Stones." Gomez knew the ore had special properties from the very beginning — he'd been concealing this information and privately trading ore with forces outside the barrier.
- The Banishment Scene — Gomez orders Guard Captain Thorus to announce your banishment before the entire Old Camp assembly. Thorus was your superior, but duty is duty. Bloodwyn and Scar are also present — their reactions range from "smug satisfaction" to "visible guilt," depending on the relationship you built with them in Chapter 2.
- Losing Everything in the Old Camp — After banishment:
- You can no longer enter the Old Camp — guards will attack you at the gates.
- Your storage chest contents are locked — you can only retrieve them by sneaking back in or waiting until late-game.
- All Old Camp merchants and trainers (Fletcher, Corristo, etc.) will no longer serve you.
- Your quest reputation in the Old Camp resets to zero — but your XP and skill levels are preserved.
Diego's Covert Aid — Critical Survival
The most easily overlooked but most important NPC during banishment is Diego. He secretly finds you the night before the banishment and gives you three life-saving items:
- Your Equipment — If you stored important gear in your chest, Diego retrieves it for you (but the rest of the chest's contents remain confiscated).
- Escape Route Map — Marked with blind spots and time windows in the Old Camp perimeter guard patrols. Follow Diego's route to evacuate safely without triggering additional fights.
- A Letter of Recommendation — Diego writes you separate letters to Lares of the New Camp and Fortuno of the Swamp Camp. Bring the letter to either and you can skip the new faction's entry trials and gain immediate sanctuary. This is the most important lifeline for an Old Camp player.
Rebuilding Your Position
After banishment, you have two main options: seek refuge with the New Camp or the Swamp Camp. Regardless of your choice, the process is similar:
- Join the New Camp — Bring Diego's letter to Lares, who will arrange a meeting with Lee. Lee is receptive to Old Camp defectors (one more mercenary means one more fighter against Gomez). Complete one proving quest from Lee and you'll receive Mercenary Armor — the same as what New Camp players got in Chapter 2, but its stats auto-scale to your current level.
- Join the Swamp Camp — Bring Diego's letter to Fortuno, who will help you appeal to the mentor council. The Swamp Camp's attitude toward Old Camp defectors is more complex — Namib and Tyon (Reformists) welcome you; Orun (Orthodox) is suspicious. You'll need to pass a special Psionic Trial — proving your worth to the Sleeper within a collective vision.
Note: Your training progress may be interrupted after banishment — if you were mid-way through Strength training at the Old Camp (say 45%/100%), you'll need to find a corresponding trainer in the new faction to continue. The New Camp's Strength trainer is close to Fletcher's level; the Swamp Camp is almost exclusively mana-focused. This means pure Strength warriors banished from the Old Camp may face a painful training gap — it's critical to train your primary weapon skill to a solid level (at least 60%+) before the end of Chapter 3.
💧 New Camp Route — The Old Camp's All-Out Assault & The Sleeper's Army
New Camp route players won't experience the banishment storyline (since you were never in the Old Camp), but Chapter 4 is no walk in the park either:
Military Pressure from the Old Camp
- Upon learning that the New Camp has both the Ancient Ruins intelligence and the Water Mage research, Gomez decides to strike first. The Old Camp launches an all-out assault on the New Camp — this is the largest faction battle in the game (NPC-vs-NPC, roughly 40+ combatants).
- You must assist Lee in setting up the dam defensive line. Tasks include: placing traps (requires Engineering skill — buy trap materials from Jarvis using ore), assigning defensive positions (affects NPC casualty rates in the battle), and a critical demolition task — if the New Camp's situation turns dire, blowing the only bridge to the dam buys 4 hours of breathing room.
- The outcome of this battle depends on your Chapter 3 preparation: if you mined enough ore in the Free Mine and upgraded mercenary equipment, the New Camp's defensive strength will be higher; if you neglected equipment investment, the battle will be brutal (potentially losing multiple NPCs, affecting subsequent optional quests and rewards).
The Sleeper's Army Emerges
- The Old Camp's offensive is just the prelude. The greater threat is the Sleeper beginning to amass an army on the mine perimeter — Orcs, Undead Priests, psychically-controlled mutated miners. Water Mage Saturas confirms that the source of this force is whatever lies behind the Sealed Gate in the Ancient Ruins.
- Saturas proposes a bold plan: use Conduit Stone (ore) + Water Magic resonance to temporarily stabilize the barrier, slowing the Sleeper's awakening. This plan requires you to place a Water Mage Resonator in each of the three faction-controlled mine zones — including the Old Camp's Old Mine. This means infiltrating Old Camp territory (high risk, high reward).
🌀 Swamp Camp Route — The Brotherhood's Schism & Crisis of Faith
The core conflict of Swamp Camp Chapter 4 is not external but internal — a schism of faith:
The Brotherhood Splits
- As the Sleeper's power intensifies and nightmares worsen, the Brotherhood fractures into two opposing factions:
- Orthodox — led by Orun and Cadar: Believes the Sleeper's awakening is the moment of "ascension." All Brotherhood members should offer themselves, walk willingly into the mines to be transformed by the Sleeper. They view anyone obstructing the Sleeper as an enemy — including other camps, and even dissenters within the Brotherhood itself.
- Reformists — led by Tyon and Namib: Argues the Sleeper's true nature has been misunderstood — it is not "summoning" its followers but draining life energy. Those adepts who walked into the mines to "offer themselves" never came back... and those who did come back are no longer human.
- Your choice is critical — which side you pick directly determines the Swamp Camp's ending branch in Chapter 5:
- Support Orthodox → Get the strongest offensive spells (Wind Hammer upgrades to Soul Storm), but most Swamp Camp NPCs will turn hostile in the endgame.
- Support Reformists → Retain the Swamp Camp as allies, gain defense and restoration spell enhancements, but lose access to certain offensive spell upgrade paths.
- The Third Path — If you completed enough cross-faction quests across Chapters 1 through 3 (including the hidden Diego-Lares-Fortuno liaison chain), you can persuade a portion of the Reformist adepts to leave the Swamp Camp and join the New Camp's coalition. This is the hardest to trigger but yields the richest rewards.
Fortuno's Secret
At the climax of the Brotherhood schism, Fortuno — the NPC who's been giving you daily swampweed — pulls you aside privately. He reveals a staggering truth: the dosage of swampweed he's consumed over the years has been enough to make him immune to the Sleeper's mind control. He has been secretly lacing the daily swampweed rations he distributes with trace amounts of an antidote — this is why the Swamp Camp's adepts, despite participating in every ritual, have not yet been fully controlled by the Sleeper. Fortuno is the real hero, but he can only hold out for so much longer. He places his last hope in you.
Chapter 4 Conclusion — Opening the Sealed Gate
At the end of Chapter 4, regardless of your route, all storylines converge at a single location: the Sealed Gate deep within the Ancient Ruins.
- The Conduit Stone required by the Sealed Gate is now in your possession (Old Camp route: preserved among Diego's retrieved items; New Camp route: Saturas's research sample; Swamp Camp route: slipped to you by Fortuno).
- Embed the Conduit Stone into the Sealed Gate. The massive stone doors grind open — revealing a descending staircase leading directly to the entrance zone of the Orc Temple.
- Before entering, you have one final opportunity to return to the surface. Finish every unfinished side quest, spend every last piece of ore on supplies, organize all your storage chests — once you step through this gate, there is no turning back.
Recommended Status by End of Chapter 4
- Level 16-20
- Primary weapon skill 60%-75%
- Equipped with faction final-tier armor or Ancient Ruins purple gear
- Core spells learned and upgraded to maximum rank
- Healing potions 20+, Mana potions 10+, Repair Hammers 3+
- Silver / holy-water-blessed weapon (for undead and elite orcs)
- All side quests and cross-faction hidden quests completed
- Three save slots: one at the Sealed Gate (to reload and restock), one at the Orc Temple entrance, one before the boss fight
Final Chapter: Orc Temple & The Sleeper Confrontation Estimated 3-6 hours
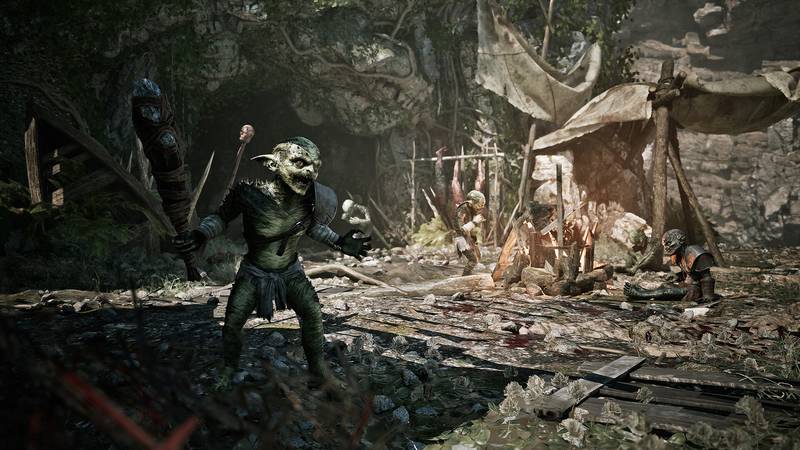
Final Pre-Entry Preparation Checklist
Before making the final decision to enter, verify every single item on this list:
- All faction-related quests completed — including every main quest and key side quest you've accepted from Chapter 1 through Chapter 4. Any unfinished quest will be permanently marked as failed.
- Best available armor equipped — Old Camp: Shadow Armor (or Ancient Ruins purple gear). New Camp: Heavy Mercenary Armor (unlocked after completing the Dam Defense Battle). Swamp Camp: High Adept Robe (unlocked after completing the Brotherhood schism quest).
- Primary weapon skill maxed (100%) — If you haven't trained your weapon skill to 100% before the end of Chapter 4, go find a trainer now and spend every last piece of ore on the final training sessions.
- All core spells learned and upgraded to max rank — Double-check that you haven't missed any advanced spell upgrades. Some spell upgrades require specific mentors (the Swamp Camp's Soul Storm requires choosing the Orthodox faction during the Brotherhood schism).
- Silver / holy-water-blessed weapon in hand — The temple is packed with undead enemies and Undead Priests; ordinary weapons deal half damage against them. If you don't have a silver weapon, at least bring a vial of holy water (dip your weapon in the Swamp Camp altar pool for a temporary blessing).
Item Carry Checklist — Minimum vs. Recommended
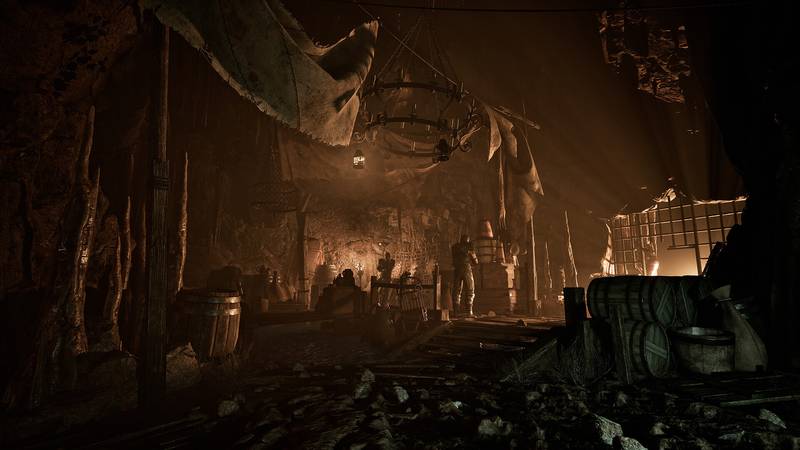 Orc Temple — Level 1: Outer Defense Zone
After the Sealed Gate opens, follow the staircase downward for about two minutes to reach the temple's outer perimeter. This is the first defensive line — a mixed force of orcs and undead.
Area Map & Enemy Distribution
- Entry Hall — 8-10 Orc Warriors, level 12-14. These are basic orcs with predictable AI; they favor head-on charges. Use ranged attacks to pull them one at a time from a distance — do not fight them in open ground as a group. Orc weak spot is the head — jump attacks (hold Forward + Jump + Attack) can trigger headshot criticals.
- Left Barracks — 3 Orc Elites + 1 Undead Priest. This is the first serious fight inside the temple. The Undead Priest stands on a stone platform at the rear of the barracks, continuously healing the Orc Elites. You must eliminate the priest first — interrupt its casting with ranged attacks, or sneak around behind the platform for a melee takedown. Without the priest's healing, the Orc Elites can be whittled down one by one.
- Right Storage Room — Relatively safe, only 3 skeletons. Contains supplies (2-3 healing potions, 1-2 repair hammers, 20 arrows). Clear this room thoroughly — this is the last supply cache you'll find inside the temple.
- Outer Zone Hidden — The ceiling of the Entry Hall has a hidden alcove that can be opened with Telekinesis or an explosive arrow. Inside is a Golden Dagger — +50% bonus damage against undead, the MVP weapon for clearing the temple.
Optimal Clear Route
Enter → Turn right, clear Storage Room for supplies → Return to Entry Hall, clear Orc Warriors (pull one at a time) → Turn left, Barracks: kill priest first, then elites → Check ceiling alcove for hidden Golden Dagger → Proceed to Temple Level 2.
Orc Temple — Level 2: Shadowbeast Lair
Level 2 is the most unsettling area in the temple — once a ceremonial passage of the ancient civilization, now overrun by Shadowbeasts.
Area Features
- Shadowbeast Corridor — 4 Shadowbeasts, level 15-17. Shadowbeasts are extremely fast, hit brutally hard, and use the corridor's corners to ambush (lurking in darkness before springing out). The strategy for passing through: use torches or Fire Bolt to illuminate ahead, forcing Shadowbeasts out of hiding, then backpedal while fighting — do not stop in the middle of the corridor.
- Shadowbeast Weakness — Shadowbeasts are sensitive to light. Torches, Fire Bolts, and Light spells (if you have one) reduce their movement speed by 30%. Flame-enchanted weapons deal +25% damage against Shadowbeasts.
- Ritual Passage — At the end of the Shadowbeast Corridor lies a relatively safe passage lined with ancient carvings. These inscriptions contain the final records on the Sleeper's origin — they reveal the Sleeper's true identity: it is not a god, nor a demon. It was once a High Priest of the ancient civilization, transformed into its current form after being backlashed while trying to use the Conduit Stone. These carvings are the key to understanding the final battle.
- Level 2 Hidden — On the left wall of the Ritual Passage, a loose stone slab can be pushed aside, revealing a hidden alcove containing 5 healing potions and 1 rare crossbow. If you already picked up bolts in the Storage Room, you can equip the crossbow immediately.
Orc Temple — Level 3: Hall of the Undead Priests
Level 3 is the temple's core ritual zone and the Undead Priests' stronghold. The layout is a massive circular hall with a central altar, surrounded by archways leading to smaller chambers.
BOSS FIGHT: Undead High Priest
- Location — Central altar of the hall.
- Level — 18, approximately 2500 HP (scales slightly with player level).
- Attack Patterns — (1) Dark Magic Bolt, linear projectile, dodge sideways; (2) Mass Curse, AoE — all players in the hall take continuous shadow damage, 5-8 per second for 15 seconds (halved by Mana Shield); (3) Summon Skeletons, 2 per cast, max 6 active simultaneously; (4) Life Drain, when HP drops below 30%, drains HP from skeletons near the altar to heal itself.
- Correct Strategy — The core loop of this fight is clear adds > interrupt Life Drain > DPS boss. Do not let any skeleton survive longer than 10 seconds — they're not just trash mobs, they're the boss's health packs. Use AoE attacks (Wind Hammer / explosive bolts) to wipe all skeletons from the field before the boss enters its Life Drain phase, then go all-out on the boss. Recommended weapon: silver or holy-water-blessed (+40% damage); Swamp Camp routes should use Soul Storm.
- Post-Battle Reward — Drops Staff of the Undead Priest (mage-only, +25 Max Mana, +30% Shadow Resistance) and Conduit Core Fragment — a key item for unlocking the Sleeper boss arena.
Chamber Exploration Value
Before and/or after the boss fight, explore the four chambers surrounding the hall:
- North Chamber — Ancient Archive: Guarded by 3 skeletons. Contains the final stone carvings on the Sleeper's origin. Reading them yields critical hints about the Sleeper's weaknesses.
- South Chamber — Sacrificial Chamber: Conduit Stone fragments scattered on the floor — collect them for use in the final battle (Conduit Stone fragments have special effects against the Sleeper — see below).
- West Chamber — Soul Spring: A pool brimming with magical energy. Bathing in it restores all HP and Mana and grants a 1-hour "Soul Shield" buff (+20% Shadow Resistance). You must bathe here before the final boss fight!
- East Chamber — Armory: Guarded by 1 Orc Elite. Contains repair hammers and a large supply of arrows/bolts.
Final Confrontation — The Sleeper
Through the final door at the back of the Level 3 hall, you enter a colossal underground cavern — the Sleeper's lair. At the cavern's center, a massive structure of Conduit Stone, and suspended at its heart: the Sleeper — a gigantic entity of pure magical energy and rock, semi-translucent, radiating unstable violet light.
The Sleeper — Boss Data
- Level — 22 (fixed), approximately 4000-5000 HP (varies with the number of Conduit Stone fragments you carry — more fragments = more destabilized Sleeper energy = lower starting HP).
- Attack Patterns:
- Psionic Blast — Conical AoE, high damage with knockdown. Approximately 2-second wind-up; dodge sideways the moment you see its head glow.
- Energy Beam — Line-locked sustained attack, 3-second duration, extremely high total damage. Cannot be blocked — must sprint to evade.
- Summon Pillar — Raises Conduit Stone pillars from the ground. Pillars can be destroyed (use blunt weapons or fire spells). If left alone, pillars continuously regenerate the Sleeper's HP.
- Mind Control — Ultimate ability, used when HP drops below 50%. The Sleeper attempts to directly seize control of your consciousness — a Will Check quick-time event appears on screen: you must rapidly press a series of button prompts. Success = immune to this control attempt. Failure = your character briefly attacks themselves (dealing 20% of current HP as self-damage). Swamp Camp route players (psionic adepts) face Will Checks at half difficulty.
The Sleeper's Weakness — Conduit Stone Backlash
From the ancient carvings and Saturas's research, the pattern is clear: Conduit Stone (ore) is simultaneously the Sleeper's power source and its fatal weakness. The Sleeper sustains its very existence through Conduit Stone energy — shatter the Conduit Stone core that forms its body, and its energy will collapse.
- Core Mechanic — The battlefield contains 6 Conduit Stone pillars (including those summoned by the Sleeper). Destroying each pillar costs the Sleeper roughly 10% of its max HP and triggers a 5-second Weakened state (stops attacking, takes +50% damage). After destroying all pillars, the Sleeper's core is exposed — pour on the damage.
- Conduit Stone Fragment Effect — If you brought Conduit Stone fragments into the temple (especially the Core Fragment from the Undead High Priest), you can use them during the Sleeper fight as consumables to detonate a pillar — dealing massive damage and extending the Weakened state to 10 seconds. Each fragment is single-use, but the effect is devastating.
- Swamp Camp Exclusive Solution — If you're on the Swamp Camp route and chose the Reformist path (Tyon/Namib), you gain a special dialogue option during the boss fight: attempt Psionic Communion to reach the Sleeper's residual consciousness — the ancient High Priest trapped within the energy entity. If you pass the Will Check (requiring 3 consecutive high-difficulty reaction prompts), you can briefly restore the Sleeper's lucidity, causing it to voluntarily destroy three of its own pillars — effectively dealing 30% HP damage + granting a 15-second DPS window.
Recommended Battle Flow
Before entering, ensure you've bathed in the West Chamber Soul Spring (Shadow Resistance buff). Upon engaging, follow this sequence:
- Don't attack the Sleeper immediately — destroy the two nearest Conduit Stone pillars first. The Sleeper's attack frequency is lower in the first 30 seconds, making this the optimal window for pillar destruction.
- Once pillars are destroyed, the Sleeper enters Weakened state — capitalize on the 5-second window with your highest-damage skills and spells.
- After the Sleeper recovers, it begins using Psionic Blast and Energy Beam — keep moving, don't stand still. There are still 4 pillars remaining (surviving initial pillars + any new ones summoned); continue destroying them while evading attacks.
- When the Sleeper's HP drops to 50%, Mind Control triggers — focus and prepare to pass the Will Check. If you're carrying the Conduit Core Fragment, use it now — it shatters the Sleeper's core stabilizer, causing it to skip two summon-pillar cycles.
- After clearing all pillars, the Sleeper's core is exposed — go all out. Spells, items, potions — burn it all. This is your final DPS window. If you die during this phase, you'll restart from Level 3 (no need to re-fight the Undead High Priest, but you must re-clear the area and re-bathe in the Soul Spring).
Endings — Multiple Branches; Your Choices Determine Fate
After the Sleeper is defeated, several critical choices appear before you. Each leads to a different ending cinematic and epilogue:
Ending Branch Overview
- Old Camp Route Ending — Gomez seizes the moment after you defeat the Sleeper and the barrier begins collapsing to monopolize the ore wealth and seize control of the colony. You can choose:
- Return to the Old Camp for revenge — Bring the power you gained in the temple and confront Gomez and his guards. Diego and some NPCs you've befriended will defect to your side at the final moment. Ending: the Old Camp power structure collapses; the colony enters a new era of self-governance.
- Leave the colony — With the barrier collapsed, you choose to leave with the knowledge you gained in the temple, letting the colony's people decide their own future. Ending: an open-ended conclusion implying your adventure has only just begun.
- New Camp Route Ending — With the barrier collapsed, the New Camp's Water Mages (led by Saturas) discover the ore's true value: it can serve as a clean energy source. Lee wants to establish a new order. Your choices:
- Help Saturas establish a new order — The colony transforms into a scholar-city researching Conduit Stone technology. Ending: technological prosperity; the colony becomes the most advanced region on the continent.
- Destroy the Conduit Stone knowledge — You deem such power too dangerous. Ending: the colony reverts to an ordinary mining outpost, but no one will ever wield Conduit Stone again.
- Swamp Camp Route Ending — If you supported the Reformists (Tyon/Namib):
- Rebuild the Brotherhood — Centered on Fortuno's teachings (harmony with nature rather than worship of power), the Swamp Camp adepts become the colony's spiritual guardians rather than its rulers.
- Reveal the truth — Expose the Sleeper's origin and the nature of Conduit Stone to all camps. Ending: the people gain a new understanding of faith and power.
Quick Reference Cards
💾 Save Discipline
Manual saves are permanent. F5 quicksaves get overwritten. Maintain at least 3 rotating save slots. Always manual save before lockpicking, faction dialogue, and boss fights.
📈 Leveling Strategy
Focus on one weapon type. Do not spread your attributes evenly. Old Camp / New Camp: prioritize Strength. Swamp Camp: prioritize Mana. Always keep enough LP in reserve for emergencies.
🛡️ Combat Survival Rules
Levels 1-3: Run from everything. Levels 4-6: Only fight scavengers, young wolves, and the weakest enemies. Levels 7-9: Most standard enemies are manageable. Level 10+: You can walk anywhere with confidence.
🔐 Lockpicking Priority
Training center locks (1-4 tumblers) → World locks (5 tumblers) → Collapsed Tower lock (7 tumblers, 57 moves). Use the Lockpicking Solver to avoid breaking your tools.